

Are you tired of spinning your wheels trying to build a successful affiliate marketing funnel?
Many aspiring affiliate marketers and even seasoned marketers find themselves overwhelmed by the complexity and time investment required to set up a funnel that actually converts.
The frustration of not knowing where to start, coupled with the disappointment of inconsistent results, can make affiliate marketing seem like an unattainable goal.
But what if I told you that creating a highly profitable affiliate marketing funnel doesn’t have to be a long, drawn-out process? With HighLevel, you can build a working affiliate marketing funnel in one place.
Whether you’re new to affiliate marketing or looking to refine your strategy, this step-by-step guide will provide you with the clear, actionable steps you need to build a successful funnel in no time.
Key Features of HighLevel for Building Funnels

HighLevel has a wide range of features for affiliate marketers and online businesses, including funnel building, membership hosting, email list management, automated text follow-ups, and integrated conversations across various platforms.
Here are the HighLevel features that matter most for building funnels.
All-in-One Platform: HighLevel combines multiple tools and functionalities into a single platform. This means affiliate marketers can manage their entire operation, from funnel building to email marketing and CRM, without needing to switch between different software.
Drag-and-Drop Builder: HighLevel’s drag-and-drop interface empowers users to design visually appealing sales funnels with ease.
Pre-Built Funnels and Lead Magnets: HighLevel has funnel and website templates, and you can import ready-made setups called snapshots, so you don’t have to start from scratch. You can customize these templates and match them to your unique brand and offerings.
Automated Email Sequences: Automation features enable you to create personalized email sequences that guide potential customers through the buying journey. This helps in effective lead nurturing, builds trust with your audience, and increases the likelihood of sales.
Multi-Channel Marketing: You can connect with your audience through email, SMS, and popular social media channels.
AI-Powered Content Creation: Thanks to AI-powered tools, you can now generate ideas, write headlines, and craft compelling copy in a few minutes. This can significantly boost your productivity and content quality.
Integrations: You can connect HighLevel to other marketing tools and services you already use, like email providers, payment processors, and more.
Now, let’s dive into the step-by-step process of building your first funnel. Remember, you can start a HighLevel trial and follow along with the steps below.
Affiliate link: I may earn a commission if you sign up for HighLevel through it.
Step 1: Sign Up for a Free Trial
The first step to building your affiliate marketing funnel is to sign up for a HighLevel free trial. This is an affiliate link, and I may earn a commission if you sign up through it.
Fill in your basic information such as name, email address, and create a password. Use your newly created credentials to log in to HighLevel and access the dashboard.
Here’s a quick overview to help you navigate:
Dashboard Overview: The main dashboard provides a summary of your activities, including recent sign-ups, sales, and performance metrics.
Menu Navigation: On the left side, you’ll find the main navigation menu with options such as Dashboard, Contacts, Conversations, Calendar, Payments, Marketing, and more.
Quick Access Buttons: At the top, there are quick access buttons for creating new funnels, sending emails, and checking notifications.
Help and Support: If you need assistance, the help and support section is easily accessible from the dashboard, offering tutorials, FAQs, and customer support contacts.
Step 2: Update Your Affiliate Links
Before building your funnel, it’s essential to have your affiliate links ready.
In HighLevel, you can save each affiliate link as a custom value and use it on your pages and in your emails. When a link changes, you update it in one place.
To set up your affiliate links:
Open Custom Values: Go to Settings, then Custom Values.
Add a new value: Click to add a custom value and give it a clear name, like the product you are promoting.
Paste your affiliate link: Paste the link as the value. Make sure the links are accurate to ensure you receive credit for referrals.
Update links in one place: If a link changes, edit the custom value and save. Pages and emails that use it pick up the new link.
Save and use it: Check each link for accuracy, save, then insert the custom value into your buttons and emails.
Step 3: Create a New Funnel
Now that you have set up your account and integrated essential features, it’s time to create your first funnel.
These steps will guide you through selecting a template, customizing your funnel pages, and setting up the essential components to ensure a high-converting marketing funnel.
Access Funnel Builder
Navigate to Sites > Funnels: On the left-hand menu, click on the “Sites” tab. Within this section, select “Funnels” to be directed to the funnel creation dashboard. This is where you will manage all your funnel projects.
Choose “Create New Funnel”: Once you are in the Funnels section, look for the “Create New Funnel” button, usually located at the top right of the screen. Clicking this button will initiate the funnel creation process.
You have the option to either use a pre-designed template or start from scratch. For beginners or for those looking to save time, selecting a template is highly recommended.
You can choose from a variety of templates categorized by industry and purpose, such as business coaching, health and wellness, and more.
Select a Template
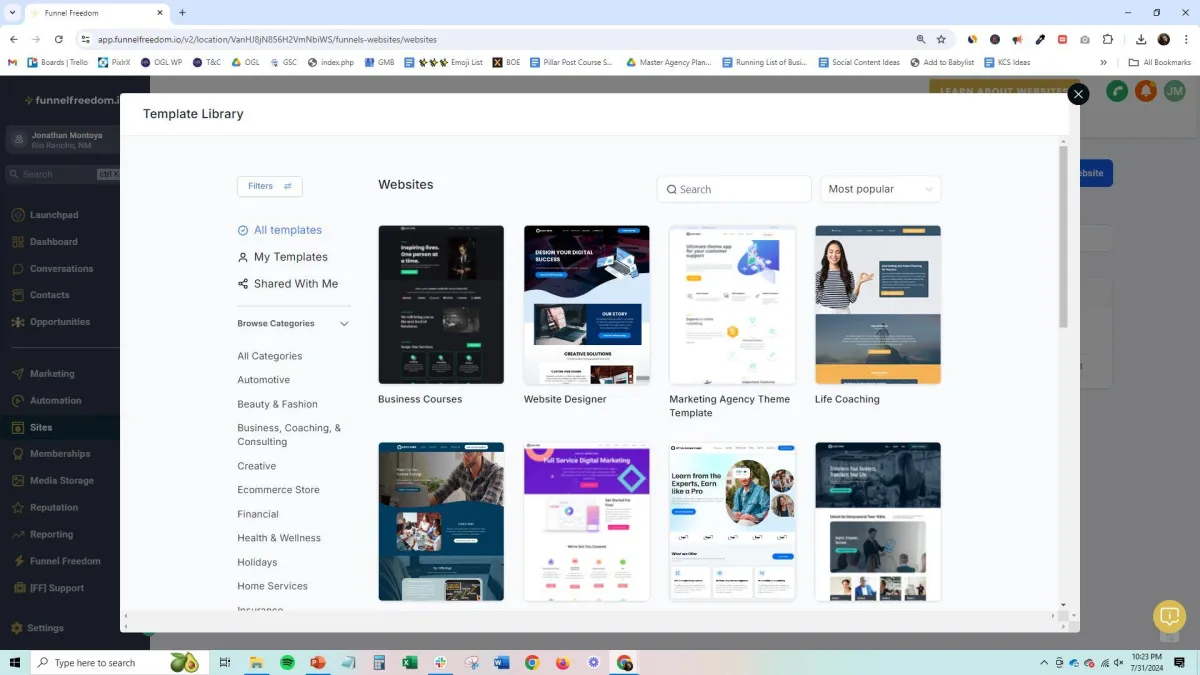
Browse through the template library: These templates are pre-built with proven layouts and elements that cater to specific business needs, such as Business Coaching, Health and Wellness, E-commerce, and more.
Select a template that fits your business category: Before selecting, you can preview each template to see its design and structure. This gives you a clear idea of how the template will look and function.
Customize the template to match your brand’s look and feel: This includes updating colors, fonts, adding your logo, and ensuring the overall design is cohesive with your branding.
Customize Funnel Pages
Once your template is selected, it’s time to customize the individual pages of your funnel. This involves editing sections, headlines, text, images, and buttons.
Edit sections to fit your content: Adjust the layout and structure of each section to accommodate your specific content. This may involve resizing sections, rearranging elements, or adding new sections to highlight key information.
Use AI to add headlines and bullet points: Use HighLevel’s AI content tools to create compelling headlines and bullet points that grab user attention. These headlines and points should clearly communicate the benefits of your offer and encourage users to take action.
Insert relevant images and customize buttons: Improve your funnel pages with relevant images that support your message and resonate with your audience. Customize buttons to stand out and clearly indicate the desired action, such as “Sign Up Now” or “Learn More.”
Set Up Funnel Steps
Start by adding a landing page. Choose from the available templates or create one from scratch. This page should be designed to capture the interest of your visitors and collect their contact information.
Click on ‘Add New Step’ and select ‘Landing Page’. Name your page and choose a template or start from blank.
Edit the page by adding headlines, text, images, and a strong CTA like “Sign Up Now” or “Get Your Free Guide”.
Next, add a thank you page. This page should confirm the action taken by the user and guide them to the next step.
Click on ‘Add New Step’ and select ‘Thank You Page’. Name your page and choose a template.
Personalize the page with a message of thanks and include a CTA to guide users further, such as “Check Your Email” or “Explore More Offers”.
Finally, add a sales page where you present your main offer and encourage users to make a purchase.
Click on ‘Add New Step’ and select ‘Sales Page’. Name your page and choose a template.
Detail the benefits of your offer and include persuasive content. Add a clear CTA like “Buy Now” or “Join Our Program” to drive conversions.
Integrate Payment Options
To monetize your funnel, integrate your preferred payment gateways, such as Stripe or PayPal. This allows you to handle transactions directly within the funnel.
Access Payment Settings: From the main dashboard, navigate to the ‘Settings’ section. Click on ‘Payments’ to access the payment integration options.
Add Payment Gateway:
Stripe: Click on ‘Connect with Stripe’. Follow the prompts to log into your Stripe account and authorize the connection.
PayPal: Click on ‘Connect with PayPal’. Log into your PayPal account and complete the authorization process.
Other Gateways: If you use other gateways like NMI or Authorize.net, select the respective option and enter the required API credentials.
Configure Payment Options: Once connected, configure your payment options, such as setting up product prices, recurring payments, and invoice settings. Ensure your products or services are linked to the correct payment gateway in your funnel steps.
Test Payments: Run a test transaction to ensure everything is working correctly. Verify that payments are processed and recorded in your connected accounts.
Save Settings: Save your payment settings to finalize the integration.
Configure Automation
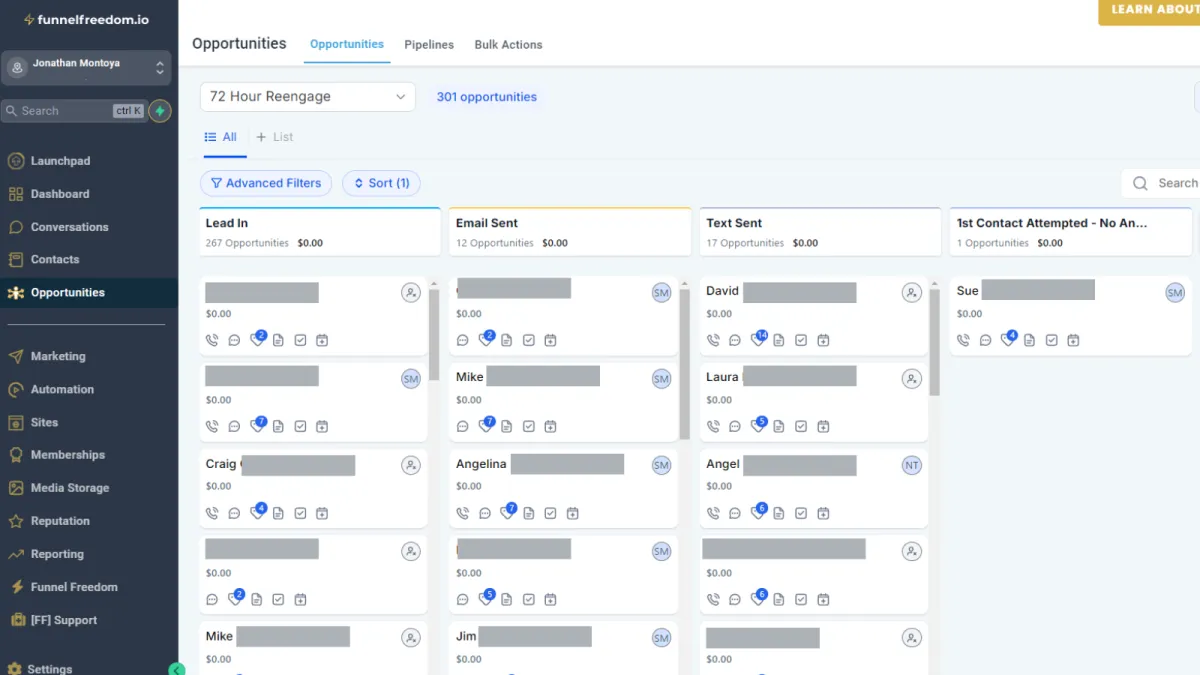
Automation is essential for an effective funnel. Set up email and SMS sequences to nurture leads and automate follow-up messages based on user actions.
Set Up Email and SMS Sequences
Access Automation: Log in to your HighLevel account and go to the ‘Automation’ tab from the main dashboard.
Create a New Workflow: Click on ‘Create New Workflow’ to start setting up your automated sequences. Name your workflow for easy identification.
Design Your Sequence:
Email Sequences: Add a ‘Send Email’ action to your workflow. Compose your email content or select a pre-designed template. Schedule these emails to be sent at specific intervals (e.g., immediately after signup, one day later, three days later).
SMS Sequences: Add a ‘Send SMS’ action. Write concise, engaging messages and schedule them to complement your email sequences.
Automate Follow-Up Messages Based on User Behavior
Set Triggers: Define actions that will trigger your automated follow-ups, such as user sign-ups, purchases, abandoned carts, or interactions with your emails or website.
Add Conditional Logic: Use conditional logic to tailor your follow-ups based on user behavior. For example, set conditions to send different emails to users who opened the previous email versus those who did not.
Personalize Messages: Use dynamic fields to personalize follow-up messages. Address users by their name and reference their specific actions or interests to make the communication more relevant and engaging.
Schedule Follow-Ups: Determine the timing of your follow-up messages. Immediate follow-ups can acknowledge actions taken by the user, while delayed follow-ups can provide reminders or additional information.
Publish and Test
Once your funnel is set up, it’s time to publish and test it. Testing ensures that all steps and automations work correctly, catching any potential issues before going live.
Walk Through the Funnel: Simulate the user experience by navigating through each step of the funnel, ensuring intuitive navigation and smooth flow. Review all content for accuracy, relevance, and correct formatting, ensuring there are no typos or errors.
Test Links and Forms: Click on all internal and external links to verify they direct users to the correct destinations. Submit all forms to ensure they capture and send data correctly, triggering appropriate actions like adding leads to your contact list or sending confirmation emails.
Check Emails and Automations: Verify that automated email sequences are sent on schedule and contain the correct content by interacting with them. Test all automation triggers to ensure they activate the correct workflows, such as sign-ups triggering welcome emails and purchases triggering post-purchase emails.
Cross-Device Testing: Test your funnel on both mobile and desktop devices to ensure it is responsive and user-friendly across different screen sizes. Check the funnel’s functionality in various browsers (e.g., Chrome, Firefox, Safari) to ensure consistent performance.
Want an AI team to help run your business?
Disclosure: I am a co-founder of AIM Agent and have a financial interest in the product.
AIM Agent is an AI Chief of Staff for business owners. It comes with an AI C-suite (COO, CMO, CFO, CRO and CTO), a Business Bot Builder and 100+ business skills, and it runs on AIM OS, a private vault that holds your notes and memory.
You give it a real task, and it brings the work back for you to review. You stay the one who approves.
About the Author

Jonathan Montoya is a former electrical engineer, husband, dad, and man of faith. He started building online in May 2019, left engineering in March 2020, and has built 3 seven-figure businesses. Today he teaches regular people how to use AI to build a business.
Frequently asked questions
What is an affiliate marketing funnel?
It is a series of steps that takes a visitor from your content to an opt-in page, emails, and then the offer.
Do I need a funnel for affiliate marketing?
It is not required, but a funnel helps you build an email list and follow up.
What pages does a funnel need?
A landing page, a thank you page, and an email follow-up sequence are a good start.
